Showing posts with label Webmaster Tricks. Show all posts

How To Download Android APK’s Apps and Games Directly to your PC?

1.First of all go to APK Downloader By Evozi
Download-Android-Apps-Games-APK-To-Your-Pc-For-Free
2.Just paste the URL of the app which you want to download, in my case i’m downloading the Google Analytic App :) Note that you can download only the free apps through this trick.
3.Hit “Generate Download Link and you’ll get the details and the download link, Click the download link  and enjoy! :)
Every good thing has a limitation,similarly you can’t use this trick to download many apps, after downloading 2-3 apps, you will get an errors saying that “You exceeded the maximum download limit of the day”.Don’t worry, we have a solution for this! In the same site,you’ll find the Google Chrome Extension which performs the same function, go download it here- APK Downloader For Chrome.
After downloading it, install the extension.And you’ll be redirected to the settings page.
APK-dwonaloader-Android-apps-toPC
Just put in your E-Mail which is used by the Google Play store. Follow the manual process mentioned there or just download the Android Device ID App By Evozi to find your GSF ID KEY and click the Sign In button. Now go to the Google Play store and find any of the app which you wanted to download, you’ll see a small icon of the APK Downloader in the to extreme right of the field in which you put the URL’s.
Google-Apk-Downloader-Paid-Apps-Download-Free
Click on that icon, once you click it, the APK File gets downloaded on to your PC.Copy the APK file to your Android Device,install it and enjoy! With this method you can keep downloading all the apps you need directly to your PC and later on transfer it to your phone. This will save your data pack in the mobile. Stay tuned for many more Tricks :D

How to Get Free Domain NAME!

Free Domain Name providers
http://www.s5network.info – free .com .net .org .info .biz offer

http://www.domainsite.com – free .info offer

http://forums.inuration.net – free .com .net .org .info .biz offer
“Almost” domains (domain-like subdomains)

Note: More info on these services will be added soon

yoursite.co.nr 
www.co.nr

yoursite.biz.ly www.biz.ly

yoursite.net.tc, yoursite.net.ms, etc. www.smartdots.com, www.unonic.com, andwww.cydots.com

yoursite.us.tt, yoursite.uk.tt, etc. www.joynic.com

yoursite.int.tl www.int.tl

yoursite.i.am, yoursite.on.to, etc www.v3.com

yoursite.q.la, yoursite.1.vg, etc. www.afraid.org

yoursite.4t.com, yoursite.8k.com, etc. www.freeservers.com

yoursite.b3.nu, etc. www.smartredirect.com

yoursite.com.ru, yoursite.net.ru, etc. www.lifelesspeople.com

yoursite.po.gs www.po.gs

yoursite.da.ru www.da.ru

yoursite.uni.cc www.uni.cc

yoursite———- www———-

yoursite.eu.org 
www.eu.org – only residents / non-profit orgs. in Europe

yoursite.za.net 
www.za.net – only residents / organis. in South Africa

Top 10 Blogger Hacks and Tips!

 I hope this article helps you guys out and if you have any others please let me know in the comments…
1. Removing The Blogger Bar
I hated the blogger bar across the top of my Web site because it didn’t really go with my template and I already had a Google search bar integrated. So I went on a mission to remove it and de-bloggerify my blog. I searched far and wide and for some reason kept hitting a dead end. It turns out that the code used to change the old blogger templates no longer works! So after tracking down the CSS changes here is how I did it:
Blogger Tips - Removing The Blogger Bar
All you need to do is add the following CSS to your template under edit HTML. You need to put in anywhere in your template between the <style> tags.
    #navbar-iframe { height:0px; visibility:hidden; display:none; }
2. Add a randomizer to show different quotes, graphics or html.
I used to be really jealous of Feedburner’s awesome quotes that change on refresh. I went out looking for my own way to do something similar. It was a long and grueling task but I found it (Well actually my buddy Mike Commodore found it). Check out how I use a free Randomizer ASP application to get my own random geeky quotes and ads to display. I have the quotes on display in my subheader here and the Wicked Tee’s Ad is also on a separate randomizer. To download the RandomQ program hit their website here. For detailed instructions on how we got it to work using iFrame’s check out these step by step instructions.
Show different quiotes with each refresh
3. Recent comments
Use this script to achieve a WordPress-esque Recent Comments module for your side bar! Start some riots among your readers! Let them know what others have to say. This site provides a widget creator that I used to make my recent comments module. I found that after adding this, it actually encouraged people to comment more frequently. I don’t know if they like seeing their name up in lights or if they read what others wrote and want to kick in their two cents… But either way it has increased commenting by about 70%!
4. That’s a lot of comments!!
Replace your commenting system with Intense Debate for more control over comments with a social flare. It is really easy to do, check out this information from their web site:
Interested in the comments your friends make? What if there was a way to follow your friends and be notified when, where, and also what they comment? Intense Debate provides this functionality through RSS feeds for each user. Subscribers will be notified in their RSS readers with a direct link to view the context surrounding the comment as well. Give it a try!
Also, don’t waste anymore time checking back in on a blog to see if anyone responded to your comment. Now you can get email notifications of replies to your comments, letting you know when the conversation continues while you’re gone.
ID
5. Adding inline ads
Want to add advertisements into your posts for maximum exposure? By having your ads out their in front of peoples face they just might click them more often. I am not a big believer in ads. But maybe you are and by following these instructions from MyDigitialLife you can add adds in your post between post or even in the footer. It is not hard to do and involves a little modification to your template. Due to the fact that Blogger parses out some code and changes some characters when you enter it manually in the html this will show you a workaround for that.From their web site:
6. Use Feedburner
Feedburner lets you “burn your feed” and add feed flare. Before they were a Google company they were awesome but now that they are a part of the Google they are even better. I use Feedburner for feed statistics, monitoring users subscriptions, managing our daily email blast list and adding feed flare enhancements to your feed. This is a MUST do for any blog. Almost a no brainer. Blogger lets you specify your Feedburner information in their ‘Site Feed’ tab inside your dashboard. Once there you will see a place to plug in your Feeburners URL.
feedBurner
7. Add additional pages (Add links to older posts that you can customize like a contact page.)
This is one thing I always hear people complaining about blogger. But I can’t add a second page or even a page for contact information… Wahhh Wahhh Wahhh. How about a little creativity? For this hack all I did was create some posts labeled About Us Contact Us etc. And then made their published dates way back when and linked to the posts from my template. Result – pseudo additional pages!
NewPages
8. Use a real domain name instead of blogger’s default naming conventions
In the beginning before we knew any better we though using a free service like Blogger meant being locked into certain things like the sub-domain name off of Blogspot. Google lets you “Brand” your blog and link up a real domain name to forward to your Blogspot address. But they did one better and redirect their address’s to yours. So even if you type in http://askTheAdmin.blogspot.com you will wind up at http://www.askTheAdmin.com! Sweet.
Your-Domain-Name
9. Add Instant Messaging to your Blogger blog.
Want to chat with your users real time? I added Plugoo to my site, linked it up with my AIM account and I am in constant contact with users looking for help or just wanting to say what’s up. This is not for everyone but I found it so cool I now turn my AOL IM mobile when I am AFK and my IM’s hit me via Text message on my Smart Phone.
pluggo
10. Update you blog daily and have quality content. .
And the last but certainly not least Blogger tip/hack is not a hack at all but a piece of advice . Update your blog on a daily basis. Because that is all the readers want now isn’t it? Would you read your own site – if it wasn’t yours?? If your answer is no, then you got some serious re-thinking to do!
Do you have any additional tips or tricks for blogger or other blog hosts? We would love to hear about it in the comments!

5 AdSense Optimization Tips To Help You Get Rich Quicker!

For anyone who’s looking to build a sizeable stream of income online, AdSense is one of the best available options. As far as advertisement options go, it’s one of the most reputable networks with a huge customer base; additionally, it’s extremely easy to implement.
Provided you have a website with good traffic, earning a good monthly check from AdSense can be as simple as placing the right ad units in the right locations.
5 AdSense Optimization Tips To Help You Get Rich Quicker
For all webmasters who keep wishing their AdSense earnings were more substantial, this article should be useful. We’ve compiled the 5 most efficient and user-friendly techniques that will help you get some impressive results as an AdSense publisher.
Above the fold placement
Different websites have different ideal placements, and you should keep experimenting until you find what works best for you. Regardless of the fact, the single most universally efficient AdSense placement is above the fold (i.e. the area of your website that can be viewed without scrolling down).
The closer to the top of the page you place your ads, the more clicks they will attract. Also, the more seamlessly you blend in your ads units with your website design, the better it will work. Try to always look at your website from the standpoint of a visitor, and you’ll find it much easier to change the layout in a way that boosts your earnings.
Include custom search
Not too many AdSense publishers bother to set up a Google custom search in their websites, which is a shame. While this tool doesn’t work for all kinds of website, custom search can provide a nice boost to your revenues.
How do you know if this will work for you? Simple! If you have a search box in your website which your visitors are already using, you just have to switch it for a custom search engine that includes AdSense ads, and you’ll get plenty of extra clicks.
Use Link Units
Much like the custom search box, link units don’t work for every webmaster. But if you have a website with a navigation menu that visitors frequently use, you can rely on link units to improve your earnings. Just place this kind of unit next to the menu, and it till look just like a secondary navigation bar, meaning it will get plenty of clicks on a regular basis.
Build Organic Traffic
Asides from optimizing your AdSense placement (which is something you should keep doing until you find the sweet spot that works for you), there is much you can do to make sure your earnings keep rising every month. Most notably, you need to build up your organic traffic… simply because people coming to your website from Google are more likely to click your ads than anyone else!
If you’re not quite sure about how you can build your organic traffic, you can find lots of great advice in this same website. Improve your website’s SEO tactics, and your traffic and earnings will follow suit.
Never, *Ever* Cheat
Have you ever felt tempted to ask friends to click your ads, or even hire shady services to do such a thing? If so, that’s a great way to get banned from AdSense. Not to mention it also equates with stealing money from advertisers… so you should absolutely avoid it. Cheating AdSense is never a good idea, and all people who try doing so will get caught sooner than later.
The key to earning a good stream of income from AdSense is to always play by their rules, and build a legitimate business as a publisher. Keep working on your website and improving its organic traffic; optimize your AdSense placement according to the suggestions in this article, and you’ll earn a bit more each and every month!

Get Google AdSense Account Within 24 hrs.!

Now-a-days, it is very difficult to create a Google Adsense account. But you can create a adsense account within 24 hrs, where direct application need 2-3 day. It is too easy.
Step 1:
First sign up the following link
http://www.indyarocks.com/register_step1.php
Step 2:
Upload minimum 10 photos and your profile pic (original)
Complete your profile (minimum 50%)
Step 3:
Visit this link http://www.indyarocks.com/adsense/adsense_index.php
Create+Google+AdSense+Account 
 
that's it!

Make Google AdSense Account With Docstoc!

Make Google AdSense Account With Docstoc


Hey, welcome back in my Google AdSense approved tricks post. Previously i discuss how you can easily get approved in AdSense with hubpages, weebly, indyarocks and blogger/blogspot. Now i am going to share another easy tricks for getting AdSense account. It’s with Docstoc.com.
Check This Out: Adsense Account Quick Approving Tricks
To do this, follow the following instructions.
1. First go docstoc.com
2. Now, create a new docstoc account by clicking “Register”
3. If you have a Facebook account, not need to be create a new account. Just click in “Login with Facebook”. If you wants to create a new account fill the required information and submit.
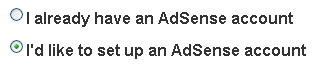
4. Now, they provide you two options for new AdSense account, click the second one. (see the picture)
5. Now go for uploading documents. Click on “Upload” option and upload few documents (pdf, PowerPoint presentations, text documents, word document etc) (no copyright documents).
6. They will provide you a new mail for Google AdSense account. Fill the form and submit to Google AdSense.
7. Wait 2-7 days and you must get a new adsense account if you provide legal documents.
If you wants to create Google AdSense account later, just save for later. And after uploading few documents, click “Setting” from the top-right corner. Then click “DocCash” and provide the email for new adsense account.

How To add a Chat Room to Your Blog or Website!

Chatting or instant messaging, as we all know, is very fun and useful. Sometimes, you need to chat with your buddy in case you don’t want to give them a call but want a little conversation. Skype, Yahoo Messenger, Gtalk, etc are popular for instant messaging. You need an account on the service and to know each others IDs in order to chat, but what about chatting with website or blog visitors?
A website or blog visitor will chat with you only if it’s made very easy for them. There are many reasons why you might place a chatroom on your blog. Note, that this chatroom we are talking about is not a private one. It’s like a Yahoo Chat room. Anyone can join the conversation.  Now, why would you need a chat room on your site?
Well, you might just want to increase the time people spend on your website. If yours is a social networking site, you will definitely love it. You might want your blog visitors to have a place where they all can chat with each other. You can even place this chat room on your Orkut or MySpace or hi5 profile so that you can chat with whoever is visiting your profile. Now, the question is, how do you place a chat room on your website, blog or social networking profile?

99Chats

99Chats allows you to sign up and create your very own chat room that you can embed on any website or blog you like. This service creates a custom chat room based on the information you enter and then generates a code that needs to be placed on the preferred website in order for the browser to show the chat room there.  Here’s how you can create your own chat room on 99Chats for free and embed it on your website or blog.

Sign Up

Visit 99Chats and click the Sign Up text that sits right below the big blue login button.

Create a New Chat Room

As soon as you register, you will be introduced with the Chat room builder that looks like the picture below:
This will let you choose your Chat room name and customize its design. As you can see, it has options to set language, category, tags, theme, size and background color. This way you can build a custom chat room for your website or blog.

Copy the Code

In the next screen, you will be given two different types of code to embed your newly built chat room. I think, the second one (Javascript code) will work on most sites, so you can copy it before embedding it on your website. If one doesn’t work for any reason, try the other one.

Embed Chat Room

Now, simply go to your website’s editing panel, create a new page and paste the code. If you are using WordPress (self-hosted), you can create a new page and paste the javascript code in the HTML mode of the post editing screen. Same for Blogger users. Add the new page and paste the code for the chat room to be shown.
After publishing the page that contains the 99chats code, you can visit it from your browser to see your chat room live on the internet. This is how your chat room will look like (color and size will differ based on your settings).

How to Create Free Website with Life Time Hosting!

Today, most of the internet users having website or blog. Its a good identity  for website owner. Here i have shared 10 sites to create free website and free life time hosting. It is very useful for all to create your website and blog free.
free-website-creator-with-free-life-time-hosting
free-website-creator-with-free-hosting


1. Bravenet.com providing free hosting solution and free website creator.
2. ucoz.com gives you free domain and unlimited website hosting.
3. wix.com you can create flash website with drag and drop support.
4. 350.com is the one of the best way to create professional website.
5. freesite.org offers 100 mb web space, you can use your own domain name.
6. Terapad.com you can create website quickly with drag and drop support.
7. yola.com allows to create free website and free web space up to 15 MB.
8. Hpage.com gives you to create full free site with 300 MB web space.
9. Nexo.com provides free site, email list, groups, family, sport team and more.
10. spruz.com allows to create free social network website free.

How to Get Google Adsense Approval in Easy From 16 Sites!


Here i am telling a new concepts about adsense. Like now for Indians and some other countries too difficult to approve from GoogleAadsense. 
How to get Google Adsense account in one day? Is it possible? YES, it’s possible. Today I am going to share new and mind-blowing trick to get Adsense account in one day. Here are the 16 sites to get instant Adsense account. I have checked and working fine.
1. Go to Docstoc.com
  • Select I’d like to set up an AdSense account.
  • Submit your Email For adsense.
  • Fill your details and Create Account.


That’s it. You will get Confirmation mail from google adsense within 2 days.

2. Go to Flixiya.com
  • Click Sign Up
  • Fill all the details and Click Join Today.
  • Then Upload at least 10 images or Upload at least 10 videos from YouTube.com
  • Then Monetize button enabled your account
  • Click the button you are redirected to Google adsense.
That’s it. You can get approved within 2 days.

You can use these sites also to create adsense account in one day.
3. hubpages.com


For more details>>>
4. indyarocks.com


For more details>>>
5. cybersist.com

6. oocuz.com

7. rateitall.com

8. senserely.com

9. xomba.com

10. paidtoblog.com/how-it-works/

11. mediflix.com

12. skyfa.com

13. yousaytoo.com

14. youbundle.com
15. Zlio.com

16. weebly.com

17. Youtube.com


Recent Posts

Recent Comments